Great Idea for Creative Kids!
While searching for a pop up card to make for my grandson, I found so many great ideas that I couldn’t decide which one to make!
But one of the best ideas I discovered was in this awesome video from creative artist, Maybelline Chow. (Check out her blog at: www.maybeitsmaybe.blogspot.com)
neverendingcard
THANK YOU for sharing your awesome talent, Maybelline!
And here’s a shorter video, just 35 seconds long!
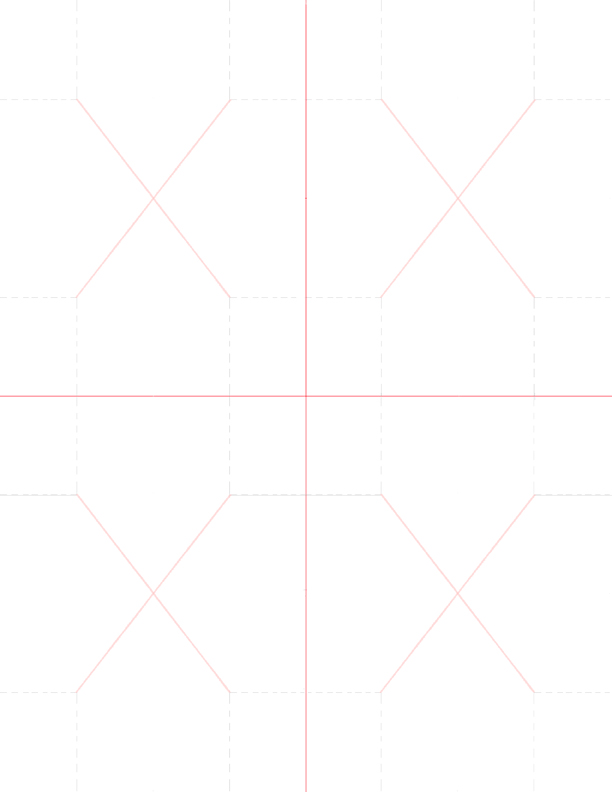
I wanted to make one of these, too, but when I couldn’t find a template, I studied the video and made my own in Photoshop. You can print it out to make 4 cards on one 8 1/2 X11 page of card stock. Here’s the template:
Drag the image to your desktop (or go to this link if that doesn’t work:
http://www.edudesigns.org/blog/wp-content/uploads/never-ending-card-base-low-res2.jpg and right click to ‘save as’ to your computer.
The RED lines show where to CUT. The GREY DOTTED lines show where to FOLD.
Here are the steps I followed after printing out the page:
NOTE: Watch Maybelline Chow’s video carefully all the way to the end. Study how the same motion is repeated each time, so you can remember it.
1- Cut the page with scissors along the solid vertical and horizontal red lines to make four cards.
2- Carefully cut the 2 lines that look like a Red X in the center of the card. I used an exact-o knife and a straight edge, over a self-healing cutting matt. (WARNING: BE EXTREMELY CAREFUL. Using an Exact-o knife, or box knife, can be very dangerous if you are not accustomed to it. If you are a child, do not attempt this without adult supervision.)
3- Once the X is cut in the center of the card, SCORE only the GREY dotted lines to make them easier to bend.
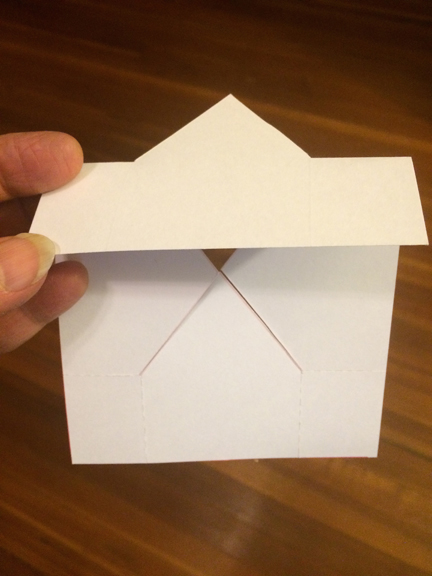
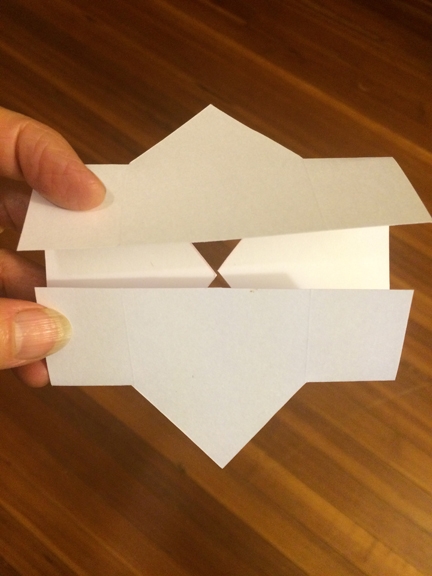
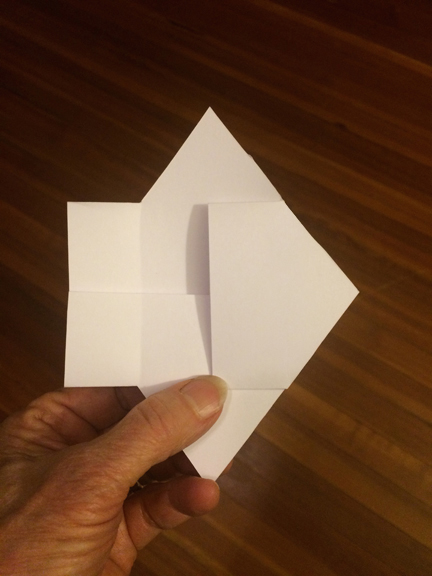
4- Holding the card in the air, bend the top section towards you, allowing the pointy part under it to swing up behind it so it does NOT get bent too. Do this for each of the sides, as is shown in the pictures below.
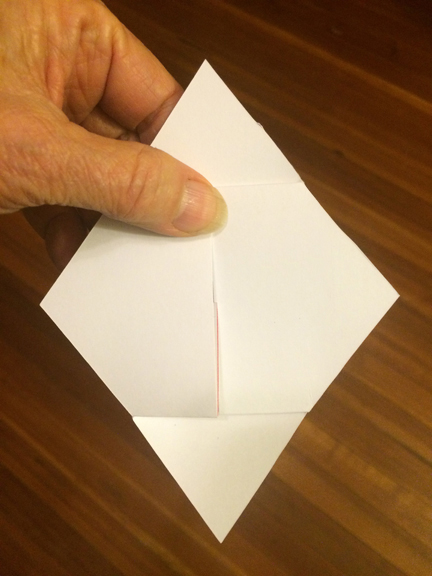
Once you’ve gotten the creases in the right place, begin by drawing your first face in the OPEN position. Observe where Maybelline put the different parts of the face in the video, so they could be covered up by the next flaps! Experiment using light pencil to get them in the right places, then fold the next part down and keep adding sections of the next face you decide on. When you are happy with the different faces on each side, you can go over them with ink, markers, or any thing you like!
Have fun!

Ruth Elliott-Hilsdon
Director, EDU DESIGNS
Creator, GoMommyGO®
Kids and Parents need all the help they can get.
EDU DESIGNS and GoMommyGO® are there to help.
Please donate!
